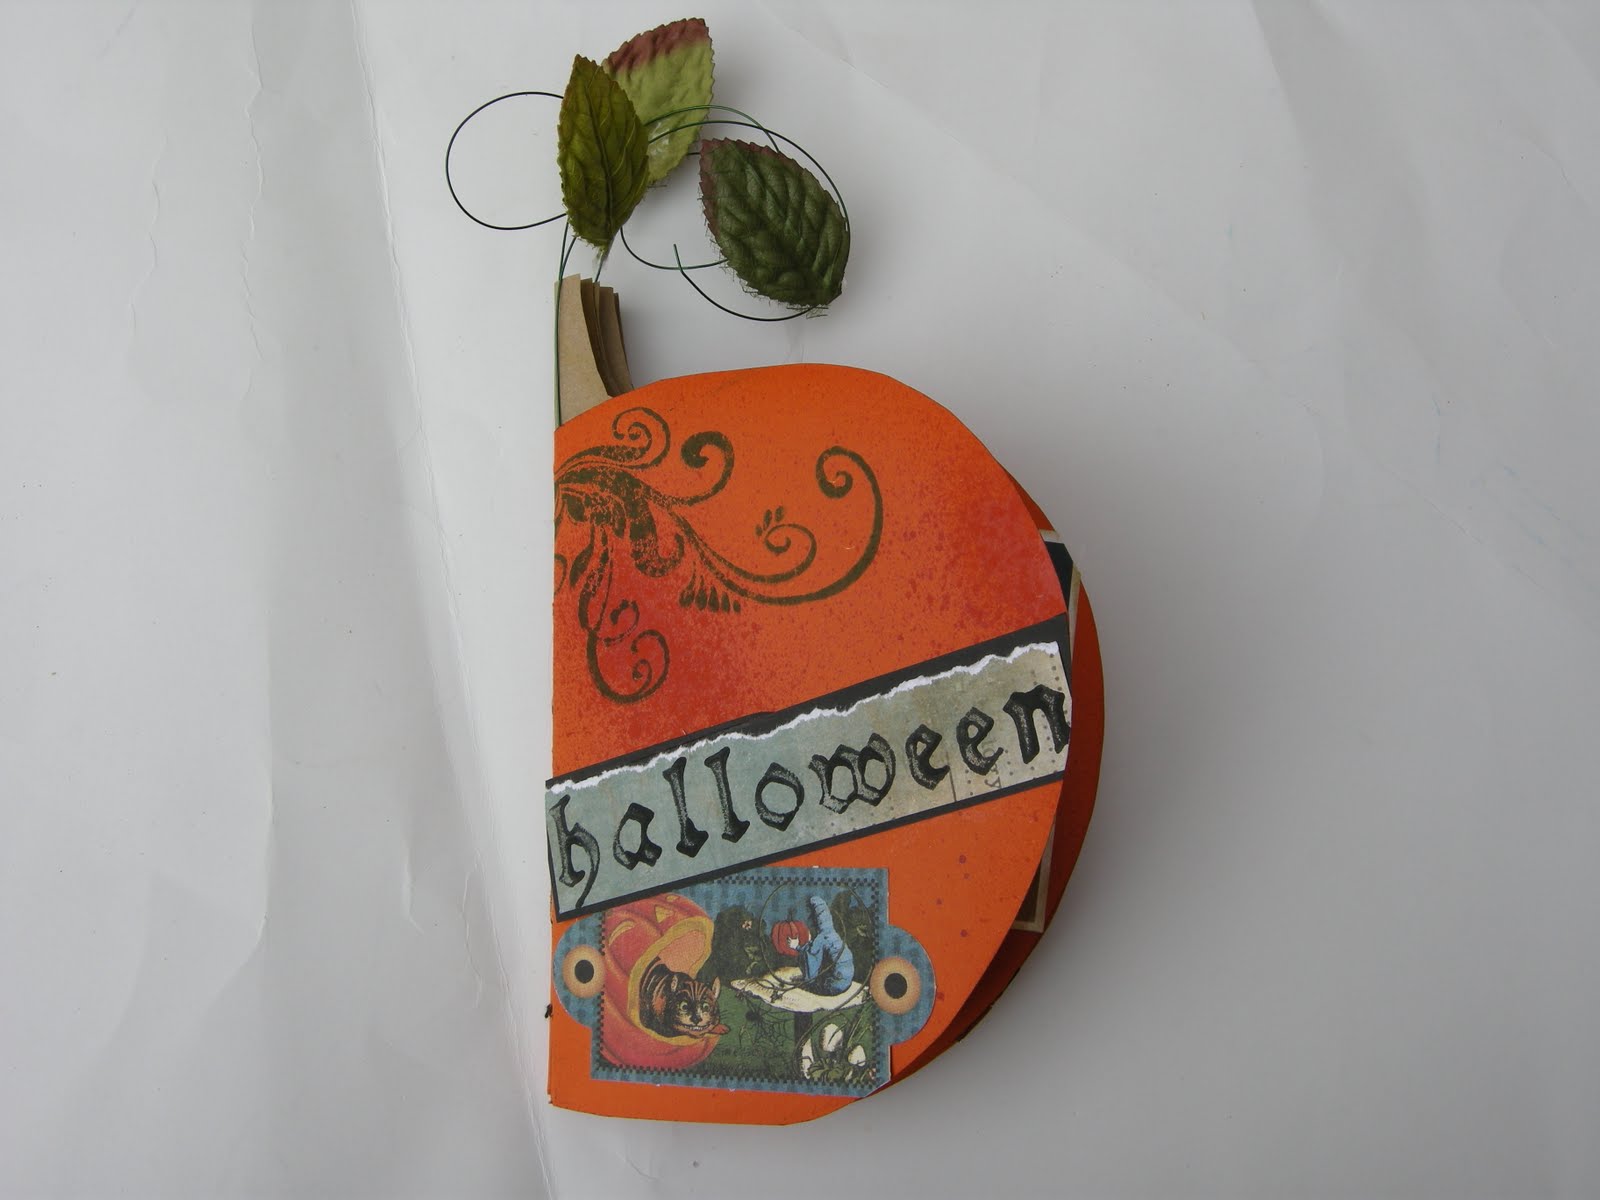
I present to you how to make a pumpkin mini album that has two purposes: to preserve your memories and to serve as a decorative element for Halloween. There are two ways to make it: version 1 is difficult because of the sewn binding, version 2 is easy, kids can make it.
Version 1- Difficile


 Materiel/Supplies
Carton/cardstock: Bazzill "Tangerine Blast"
Papiers/papers: Graphic45 Hallowe'en in Wonderland, Pink Paislee Twilight
Autocollants/stickers:Graphic45 Hallowe'en in Wonderland
Encre/Ink: Tim Holtz Distress "Dried Marigold", Glimmer mist
Crayons/pen: Posca
Feuilles/Leaves: Prima
Autres/Others: peinture acrylique/acrylic paint, fil de metal/wire, étampes/stamps
Instructions de réalisation pour la version 1
Liste de matériel
- 3 cartons oranges (je les ai choisis lisses pour qu'ils soient pareils des deux côtés)
- papier kraft
- 1 aiguille, du fil
- 3 fils de metal vert de 12" chacun
- embellissements en forme de feuilles
- photos, encre, embellissements au choix (j'ai choisi des embellissements sans épaisseur pour que l'album se referme bien à plat)
- gabarit d'album citrouille

1- Tracer 6 fois le gabarit de citrouille sur les cartons orange; le gabarit entre 2 fois sur un carton 12 x 12". Découper et plier en deux.

2- a) Maintenir les morceaux pliés un par-dessus l'autre avec une épingle à linge (pour éviter qu'ils se déplacent). Tracer des marques sur le pli (reliure) aux mesures suivantes:
1ère marque à 3/4" du bas
2e marque à 1 1/2"
3e marque à 2 1/2"
4e marque à 3 1/4"
5e marque à 4 1/4"
6e marque à 5"
La longueur totale de la ligne de pli est de 5 3/4".

b) Percer un petit trou à chacune des marques.
c) Coudre les cartons ensemble selon la technique de reliure "couture des cahiers à fil croisé":
1er carton
Passer l'aiguille dans la 1ère marque du 1er carton plié (par l'extérieur). Ressortir l'aiguille par la 2e marque, la rentrer dans la 3e marque, la ressortir par la 4e marque, la rentrer par la 5e marque et la ressortir par la 6e marque du 1er carton.
2e carton
Passer l'aiguille dans la 6e marque du 2e carton, la ressortir par la 5e marque du 2e carton. Entrecroiser le fil avec celui du 1er carton et rentrer l'aiguille dans la 4e marque du 2e carton. ressortir l'aiguille par la 3e marque, entrecroiser le fil avec celui du 1er carton. Rentrer l'aiguille dans la 2e marque, la ressortir par la 1ère marque.
3e carton
Recommencer la même chose avec le troisième carton. Enchevêtrer le fil avec celui du carton précédent (1 seul fil) et ainsi de suite jusqu'à la dernière marque. Pour attacher cette dernière marque aux cartons précédents, il faut faire une "chainette": après avoir bien tiré le fil, passer l'aiguille sous le 2 carton entre la 6e et la 5e marque, de l'intérieur vers l'extérieur; dès que l'aiguille pointe de moitié, la faire passer dans la boucle du fil. Faire ressortir l'aiguille en tirant bien sur le fil et en faisant un noeud.
4e,5e,6e cartons
Répéter la même chose qu'avec le 3e carton. Pour le 6e carton, terminer la couture avec 2 nœuds en chaînette l'un sur l'autre.

3-Embellir l'album à votre goût.
4- Enrouler la moitié de chaque fil de métal autour d'un bâton de colle pour faire des spirales. Insérer un fil de métal au centre du pli de la 1ère page, en alternance, sous les coutures de la reliure. Insérer le 2e fil au centre de l'album. Insérer le3e fil au centre de la dernière page. Coller quelques feuilles pour donner l'apparence d'un plant de citrouille.


5-À l'aide du gabarit de queue de citrouille, tracer 11 queues de citrouille sur du papier kraft et les découper. Encrer les contours si désiré. Plier en deux, déplier et coller chaque queue dans le haut de chaque pli de l'album.

Version 2 - Facile

Instructions de réalisation pour la version 2
Liste de matériel
- 3 cartons orange (ça peut être 2 orange foncé et 1 orange pâle pour alterner les couleurs)
- 1 feuille de papier vert 7 x 9" (pas de carton, c'est trop épais)
- 1 paire d'aimants ou de velcro
1- Tracer 5 fois le gabarit de citrouille sur les cartons orange; le gabarit entre 2 fois sur un carton 12 x 12". Découper. Couper sur la ligne de pli de façon à obtenir 10 morceaux.
2- Plier le papier vert en accordéon à chaque 1/2" comme sur l'exemple.
 3- Coller les demi-citrouilles de carton orange dans le creux des plis accordéon, 1 par pli. Pour débuter, placer l'accordéon plié en position verticale, à votre gauche. Ouvrir le 1er pli. Le 1er carton orange sera collé du côté gauche du pli ouvert. Coller les autres cartons du même côté jusqu'au dernier pli où il y aura 2 cartons (1 de chaque côté du pli). Si votre papier vert n'est pas recto-verso, collez les citrouilles, sur le côté vert.
4- Coller un aimant au milieu de la première page dans le creux de la reliure accordéon. Coller l'autre aimant au milieu de la dernière page. Cacher ensuite les aimants en collant des embellissements par dessus. Les aimants servent à maintenir la citrouille en position ouverte lorsqu'elle est debout sur une table.
Step-by-step instructions for version 1- Difficult
Supplies list
- 3 orange cardstocks (I chose a smooth cardstock so they are smooth like on both sides)
- Kraft paper
- 1 needle, thread
- 3 green wires of 12 "each
- Leaves embellishments
- Photos, ink, embellishments of your choice (I chose flat embellishments so the album closes flat)
- Pumpkin Album template
1 - Trace the pumpkin template 6 times on cardstock, the template will fit 2 times on a 12 x 12 " cardstock. Cut and fold in half.
2 - a) Keep the pieces folded over one another with a clothespin (to prevent them from moving). Draw marks on the fold (binding) at the following spots:
First mark 3/4" from the bottom
Second mark 1 1/2"
Third mark 2 1/2"
Fourth mark to 3 1/4"
5th mark 4 1/4"
6th mark 5"
The total length of the fold line is 5 3/4".
b) Pierce a small hole at each mark.c) Sew cardstocks together using the technique of bookbinding "cross over sewing":
1st cardstock
Pass the needle into the first mark of the first folded cardstock (from outside). Out the needle by the second mark, enter the third mark, out by the fourth mark, then return by the fifth mark and out by the 6th mark of the first folded cardstock.
2nd cardstock
Passing the needle through the 6th mark of the second folded cardstock, go out by the fifth mark of the second cardstock. Interlace thread with thread of the first cardstock and enter the needle in the fourth mark of the second cardstock. Needle out by the 3rd mark, interlacing the yarn with one of the first cardstock. Retract the needle into the second mark, go out by the first mark.
3rd cardstock
Repeat the same with the third folded cardstock. Interlace the thread with one of the previous cardstock (a single yarn only) and so on until the last mark. To link cardstocks together, we must make a "chain knot": after having pulled the wire, pass the needle under the second folded cardstock between the 6th and 5th mark from the inside to the outside; when the needle go out in half, thread through the loop of wire. Bring out the needle by pulling on the wire and make a knot.
4th, 5th, 6th cardstocks
Repeat the same instructions as the third cardstock's. For the sixth cardstock, finish the seam with 2 chain knots.
3- Embellish album to your taste.
4 - Wrap half of each metal wire around a glue stick to make spirals. Insert a wire in the center of the fold of the first page, alternatively, under the seam binding. Insert second wire in the center of the album. Insert third wire in the center of the last page. Paste a few leaves to give the look of a pumpkin plant.
5-Using the pumpkin tail template, trace 11 pumpkin tails on kraft paper and cut them out. Ink edges if desired. Fold in half,unfold and paste each one in the top of each fold of the album.Step-by-step instructions for version 2 - Easy
Supplies list
- 3 orange cardstocks (it can be 2 dark orange and 1 pale orange to alternate colors)
- 1 sheet of green paper 7 x 9 " (not cardstock, it's too thick)
- 1 pair of magnets or velcro
1 - Trace 5 times the pumpkin template on the orange cardstocks, the template will fit 2 times on a 12 x 12" cardstock. Cut. Cut on the fold line so as to obtain 10 pieces.
2 - Fold the green paper accordion every 1/2"as the example below.
3 - Glue each half-pumpkin in the trough of accordion folds, one by fold. To begin, place the accordion folded upright, on your left. Open the first fold. First cardstock must be glued on the left side of the open fold. Glue the other cardstocks on the same side until the last bend where there will be 2 cardstocks (1 each side of the fold). If your paper is not green on both sides, glue the pumpkin on the green side.4 - Glue a magnet to the middle of the first page in the hollow of the accordion binding. Glue the other magnet in the middle of the last page. Then hide the magnets by gluing embellishments on top. The magnets are used to hold the pumpkin in the open position when standing on a table.


.jpg)


3 commentaires:
Voilà une belle façon de fêter Halloween! Merci pour le tuto! Bises. Nadine
Super bonne idée et merci pour le tutoriel pour la reliure.
Wow! Rewow! Ton mini-citrouille est fantastique!!!! J'adore!!!
Enregistrer un commentaire